Recipes

Sweet Potato Pie: A Taste of Home and a Thanksgiving Staple

Every year, our Thanksgiving table reflects the story of who we are — Sierra Leonean roots, Virginia living, and the traditions my children and I continue to build together. Our holiday dinner is always a blend of the foods I grew up eating and the dishes that have become part of our American life.

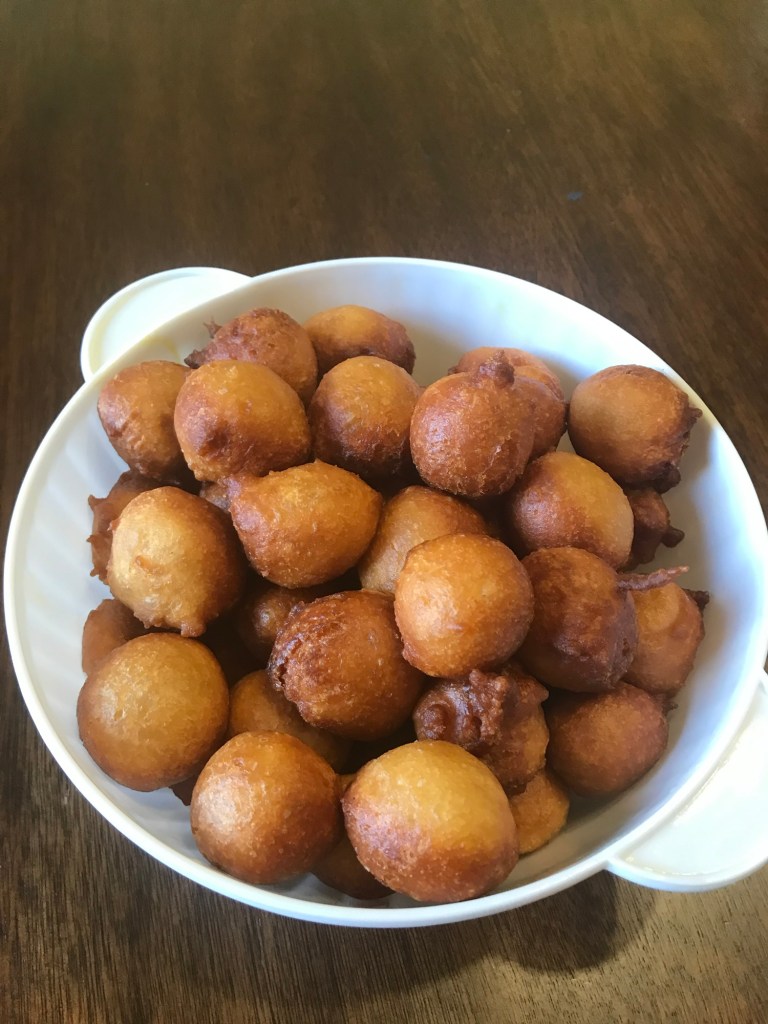
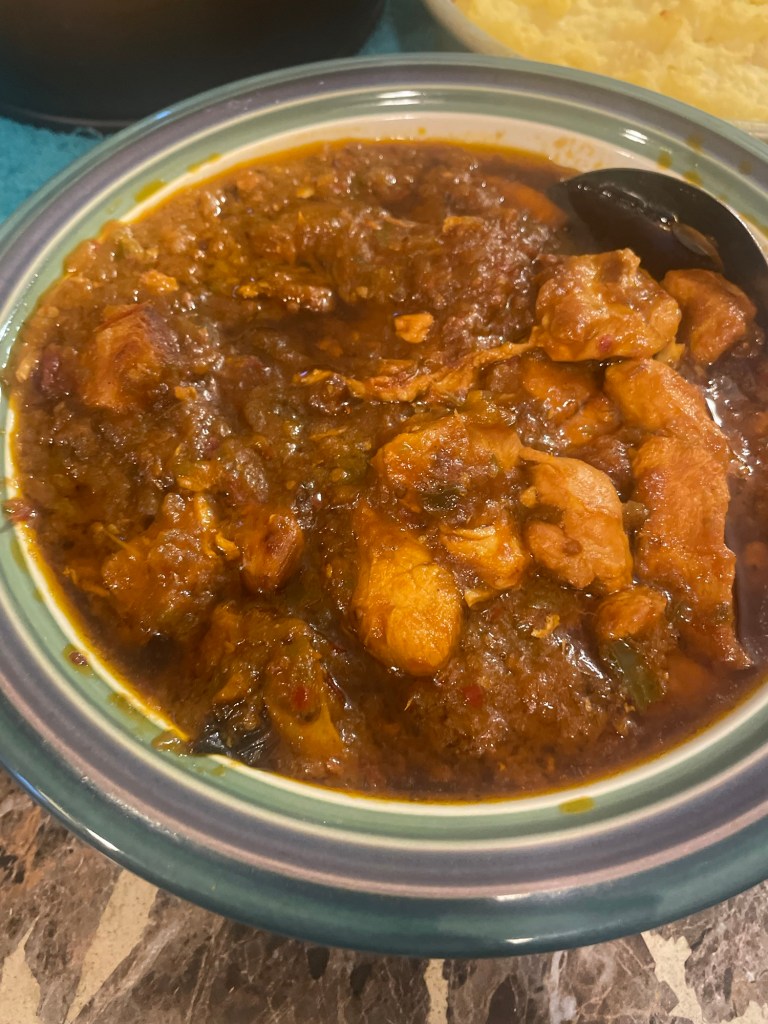
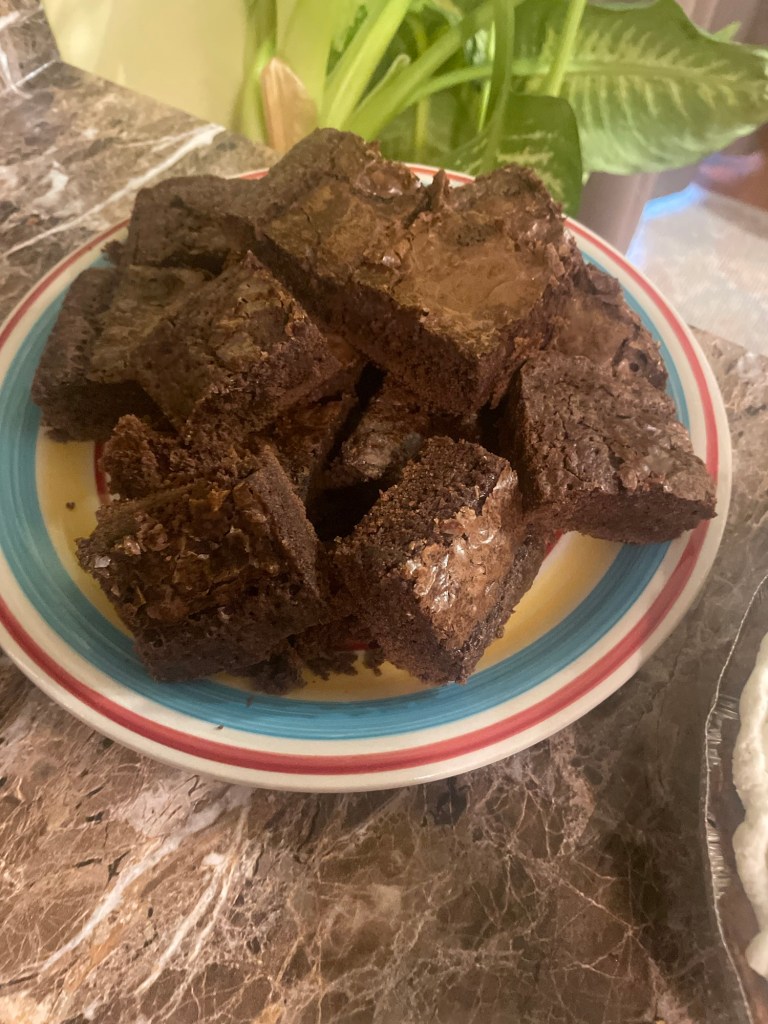
This year we had jollof rice with chicken stew, steamed plantains, and collard greens from my garden. Alongside those were the classics: mac and cheese, mashed potatoes, sweet potato rolls, cranberry sauce, and a refreshing cranberry lemonade sweetened with dates instead of processed sugar. And of course — a large, beautifully roasted turkey, dressing, gravy, and brownies to end the night.

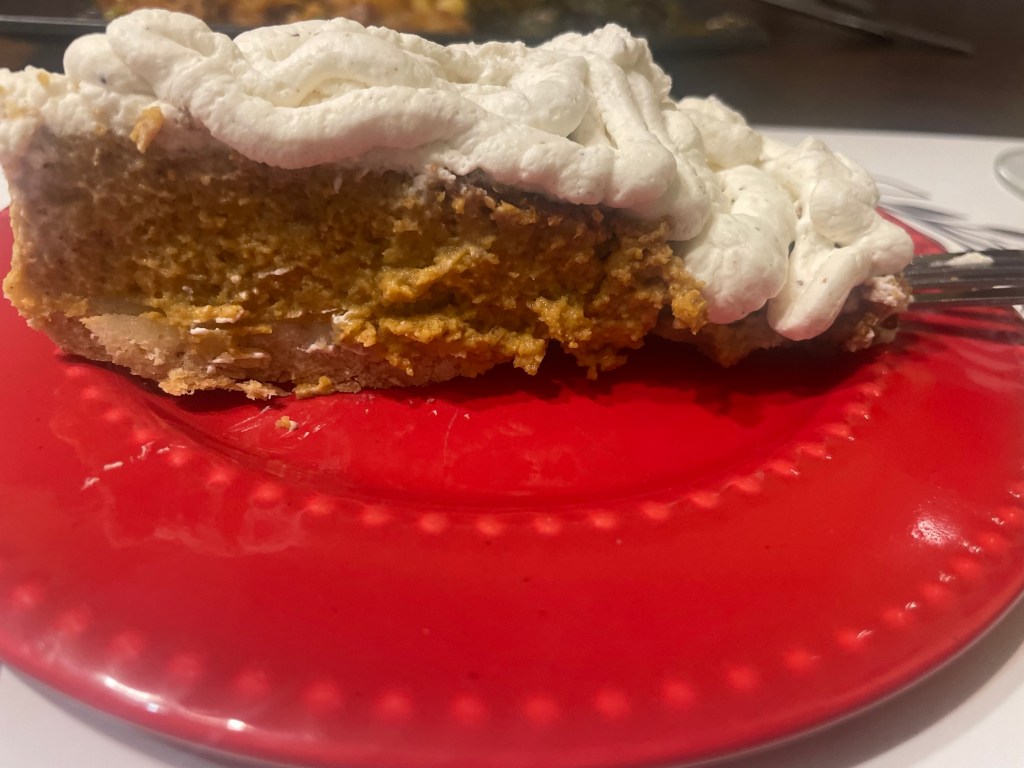
In the middle of all those flavors, one dessert stood out the way it always does: sweet potato pie. It’s nostalgic, comforting, and brings together the best of the traditions we love.

Whether you’re creating a feast for family or just craving something warm and familiar, this sweet potato pie is exactly the kind of dessert that makes a table feel like home.

Ingredients

  • 2 cups sweet potatoes, cooked, peeled, and mashed
  • 1/2 cup unsalted butter, softened
  • 1/2 can sweetened condensed milk
  • 1/2 cup raw cane sugar
  • 1 teaspoon orange zest
  • 1/2 teaspoon of cardamom
  • 1/2 teaspoon ground nutmeg
  • 1/4 teaspoon ground ginger
  • 1/8 teaspoon ground cloves
  • 1/4 teaspoon salt
  • 1 teaspoon vanilla extract
  • 2 large eggs, lightly beaten
  • 1 (9-inch) deep-dish pie crust, prebaked (I made this in advance… recipe will be posted later)

Instructions

Preparing the Sweet Potatoes

  1. I washed the potatoes I had harvested and cut them in half before boiling them.
  2. I peeled all of them after an appropriate cooling time
  3. I pureed the potatoes in my food processor but dividing into two separate portions (for the rolls and pies)

Make the Filling

  1. Reduce oven temperature to 350°F (177°C).
  2. In a large bowl, beat together the sweet potato mash and softened butter until completely smooth.
  3. Add condensed milk, raw cane sugar, orange zest, cinnamon, nutmeg, ginger, cloves, salt, vanilla, and eggs. Mix until evenly combined and silky.
  4. Pour filling into a prebaked 9-inch deep-dish pie crust with a pie shield for the edges.
  5. Bake for 40–45 minutes, removing the pie shield in the last 15–20 minutes to brown the crust.
  6. Cool completely on a wire rack. Top with whipped cream if desired.

A Slice of Gratitude

What I love most about this pie isn’t just the flavor — it’s the meaning behind it. Baking it this year gave me a quiet moment to reflect on how far my family has come, the traditions we’re shaping, and the little joys that anchor us even when life is busy and full.

And speaking of joy…

Coming Up Next Week: Our Health & Fitness Update

Next Monday, I’ll be sharing a recap of a different kind of Thanksgiving tradition — the local Turkey Trot my oldest daughter and I ran together. We both set new personal records this year, and I can’t wait to reflect on what that run meant for us, what I learned from training this fall, and how I’m preparing for my second half marathon next month.

It was a beautiful moment of bonding, growth, and celebration — and I’m excited to share it with you.

Recipes

🍪 Festive Family Cookies: A Sweet Twist on Prue Leith’s Iced Tea Biscuits

Introduction

There’s something magical about baking during the holidays. Sweet aromas fill the kitchen. Laughter comes when flour dusts the counter. There is joy in creating something together as a family.

The kids and I decorated these while playing a musical trivia game.

This year, I wanted to try something a little different. I decided on a festive cookie that brings everyone to the table. It’s perfect for both baking and decorating. I was inspired by The Great British Baking Show and Prue Leith’s elegant Iced Tea Biscuits. I created my own version. It is a spiced, buttery cookie that’s crisp at the edges and soft in the center. It’s perfect for personalizing with colorful icing.

Ingredients

(Makes about 20 cookies)

  • For the cookies:

• 2 ¼ cups all-purpose flour

• ½ teaspoon baking powder

• ¼ teaspoon salt

• ½ teaspoon ground cardamom

• ½ teaspoon ground ginger

• ½ teaspoon ground cloves

• ¾ cup unsalted butter, softened

• ½ cup granulated sugar

• ½ cup brown sugar

• 1 large egg

• 1 teaspoon vanilla extract

• 1 teaspoon lemon or orange zest (for a bright, tea-inspired flavor)

  • For the icing:

• 1 ½ cups powdered sugar

• 1–2 tablespoons milk (adjust for consistency)

• ½ teaspoon vanilla or almond extract

• Food coloring or edible decorations (optional)

Instructions

  1. Preheat & Prepare: Preheat your oven to 350°F (175°C). Line two baking sheets with parchment paper.
  2. Make the Dough: In a bowl, whisk together the flour, baking powder, salt, cardamom, ginger, and cloves. In a separate bowl, beat the butter and sugars together until light and creamy. Add the egg, vanilla, and zest, then gradually mix in the dry ingredients until a soft dough forms.
  3. Roll & Cut: Lightly flour your surface and roll the dough to about ¼ inch thick. Cut into festive shapes — stars, trees, hearts, or whatever brings you joy.
  4. Bake: Place cookies on the prepared trays and bake for 8–10 minutes, or until the edges are just golden. Let them cool completely on a wire rack before decorating.
  5. Decorate Together: While the cookies cool, mix the icing ingredients until smooth and glossy. Divide and tint with colors of your choice. Then gather the family, pour some tea or cocoa, and enjoy decorating together.

(Insert your finished cookie photos here — include a mix of decorated and plain versions to show their natural beauty.)

Tips from My Kitchen

• These cookies taste even better the next day as the spices deepen.

• Let kids use piping bags or small squeeze bottles for creative designs.

• Store in an airtight container for up to a week — if they last that long!

Reflection

Baking these cookies reminded me that traditions don’t have to be passed down — sometimes, we create them from scratch. Whether it’s laughter over uneven icing or sneaking a cookie before the glaze sets, these moments are shared. They make the holidays special.

This recipe has officially earned a place in my family’s kitchen. It’s not just for its flavor. It is also cherished for the memories it helps make.

Recipes

A taste of home

Affiliate Disclosure:
This post may contain affiliate links. If you click through and make a purchase, I may earn a small commission at no additional cost to you. Thank you for supporting my writing and this blog.

Growing up in an African household, cooking was woven into our daily routine. My grandfather was a radical in a sense. He knew how to cook, bake, make his own moonshine and so much more. I spent a small part of my childhood with him and my grandmother. Those two shaped my life, my love of learning, gardening and cooking. Grandma didn’t write down her recipes. Neither did my mom. I am grateful that I have kept the recipes of many childhood treats. These meals are among my favorites.

In the attached video you will see me frying puff-puff, and this is such a versatile dish. It can be an appetizer, breakfast, or dessert. My kids especially liked it when I made puff-puff for their multicultural events at school.

To make puff-puff the way I remember it, you don’t need much — just flour, yeast, sugar, and warm water. But what makes it even better is having the right tools. I use a sturdy mixing bowl to combine the ingredients. I use a heavy cast-iron Dutch oven to fry them to golden perfection. When the puff-puff is done, I rely on a slotted spoon to lift them safely out of the oil. I do this just the way my grandmother did with her old kitchen tools.


My Kitchen Essentials for Puff-Puff

Slotted Spoon – makes lifting puff-puff out of hot oil simple and safe.

Mixing Bowls – for stirring and letting the dough rise.

Cast-Iron Dutch Oven – keeps the oil hot and steady, perfect for frying puff-puff evenly.

These are almost ready.

Puff-puff is a simply dish that I like to the menu on a regular basis.

African Puff-Puff Recipe

Ingredients:

2 cups plus 2 tbsp of warm water

2(1/4) tsp of active dry yeast

3(1/2) cups of all purpose flour

3/4 cup of raw cane sugar

1/2 tsp of salt

Olive oil or any vegetable oil

Optional items

  • 1/2 tsp of nutmeg
  • 1/2 tsp of powdered ginger
  • 1/2 tsp of cardamom

Instructions:

  1. Mix 2 tbsp of sugar, warm water, and active dry yeast in a large bowl. Set the mixture aside for 5 minutes, or until it becomes foamy.
  2. In another bowl sift the flour then add the remaining dry ingredients.
  3. Pour the dry ingredients into the yeast mixture and mix with either a hand held mixer or with a spatula.
  4. Cover up the batter and sit it in a warm place in your kitchen. You can use a proving draw of you want. Wait for about 1 to 2 hours and the batter should have doubled in size.
  5. In a large saucepan, pour your oil until it is about 1/3 to 1/2 of the way full. Warm it up on low heat.
  6. Test your oil by scooping a small amount of the batter and pour into saucepan. If the batter remains on the bottom of the pan, wait! Your oil is not hot enough. If your batter rises to the top of the pan within seconds then you are good to go.
  7. Most Africans scoop the batter with their hands and simply drop small dough balls into the hot oil. Don’t overcrowd the pan. It will affect cooking time. In some cases, it will make your puff-puff chewy.
  8. Fry the dough balls for a minute before turning them and cooking for a few minutes. Wait till they are golden brown.
  9. Placed the dough balls on a tray/plate covered with a paper towel to soak up excess oil.
  10. Set aside and cool off before serving with either powdered sugar, a savory sauce or just as is.
  11. This treat is prepared differently , depending on which part of Africa you are from.
  12. I am a product of Sierra Leone and this is how I remember it being made.

Thank you for stopping by 🙂